Web Workers Explained & How To Use Them
Learn how Web Workers run JavaScript off the main thread to keep apps fast and responsive, with real examples, patterns, and pitfalls.
Fri Oct 31 2025 • 28 min read
The web is no longer a passive medium. Today’s browser apps edit images, process files, crunch data, and stream live feedback — all while staying interactive. But JavaScript still runs on a single thread by default. When things get heavy, that thread gets overwhelmed: animations lag, input stalls, and interfaces freeze.
Web Workers are the browser’s built-in escape hatch. They let you move long-running tasks — like parsing, rendering, or compressing — to a background thread that doesn’t block the UI.
If you’ve used an in-browser editor that resizes photos without freezing, or a tool that shows live progress while processing a file, you’ve already seen workers at work.
This guide explores how Web Workers power fast, local browser tools — with practical patterns for messaging, cancellation, and performance. We’ll cover how to set them up, when to use them, and how they combine with transferable objects, and module imports to make modern client-side apps smooth and scalable.
What Are Web Workers?
A Web Worker is a separate thread that runs JavaScript in the background — outside the main browser UI thread. It doesn’t touch the DOM, doesn’t block user interactions, and doesn’t freeze the page while it’s working.
When you create a worker, the browser spins up a lightweight thread with its own global scope (no window, document, or direct DOM access). You send it messages, it does the work, and it sends messages back. That’s it. No shared memory, no race conditions — just message-based coordination between two isolated environments.
There are a few types of workers:
- Dedicated Workers: The most common kind. They’re created by a single script and communicate only with that script. Perfect for tools, editors, and processing jobs.
- Shared Workers: Allow multiple tabs or scripts to talk to the same background thread. Useful for syncing tabs or caching data across them — though less common in practice.
- Service Workers: A different beast entirely. They intercept network requests and handle caching or offline behavior — not computation.
This guide focuses on Dedicated Workers, since they’re the most useful for building responsive, self-contained tools.
Think of a worker as a second brain: it can think, calculate, and respond — but it can’t reach into the DOM or change what’s on screen. That job stays with the main thread. The trick is learning how to divide the labor between them.
Creating a Worker
Let’s build our first worker from scratch. We’ll start with the classic setup: a main script that spins up a worker thread, sends it a message, and logs the response.
Create the Worker File
A worker needs its own JavaScript file. Let’s call it worker.js:
// worker.js

self.onmessage = (event) => {
    const input = event.data;
    const result = input * 2; // just doubling the value
    self.postMessage(result);
};
What’s happening here:
selfis the global scope inside a worker (likewindowin the main thread).onmessagehandles incoming messages.event.datacontains whatever data was sent.postMessage()sends a response back to the main thread.
This worker listens for a number, doubles it, and sends the result back. Simple, but powerful.
Why Does a Worker Need Its Own File?
When you create a worker with new Worker('worker.js'), the browser starts it in a separate thread — and that thread needs a self-contained JavaScript file to load.
This isn’t just for organization — it’s how isolation is enforced.
- Workers don’t share scope with the main script.
- The browser loads the file as a separate environment.
- You can’t pass a function or inline code directly (though there are advanced workarounds like Blob URLs — more on that later).
By keeping the worker code in its own file, the browser ensures a clean, secure separation — which is what allows true multitasking without shared state.
Use It in Your Main Script
Now in your main HTML or JavaScript file, connect to the worker:
const worker = new Worker('worker.js');

worker.onmessage = (event) => {
    console.log('Result from worker:', event.data);
};

worker.postMessage(21); // Send data to worker
Here’s what’s going on:
new Worker('worker.js')creates the worker from the external file.onmessagesets up a listener for responses from the worker.postMessage(21)sends the number 21 to be doubled.
When you run this, the worker will respond with 42, and your console will log:
Result from worker: 42That’s your first worker in action — thinking in parallel, without touching the DOM or blocking the UI.
A Note on Scope
Workers run in their own bubble. They can’t access the DOM, the window object, or any browser APIs tied to the main thread (like alerts or localStorage). But they can use:
- Timers (
setTimeout,setInterval) - Fetch and other network APIs
importScripts()(orimportin module workers)- Typed arrays and data manipulation tools
They’re great for number crunching, file parsing, or heavy computations — anything that would slow the interface down if done on the main thread.
Now that you’ve created one, let’s look at how to pass messages back and forth cleanly.
Messaging and Data Flow
If workers are isolated from the main thread — how do they communicate?
You’ve already seen the mechanism in action: we used postMessage() to send data in, and listened for onmessage to get data out. This message-passing is the heart of worker communication. It’s simple, powerful, and surprisingly flexible.
Let’s break it down step by step — and build a mental model for how data flows between the UI thread and the background thread.
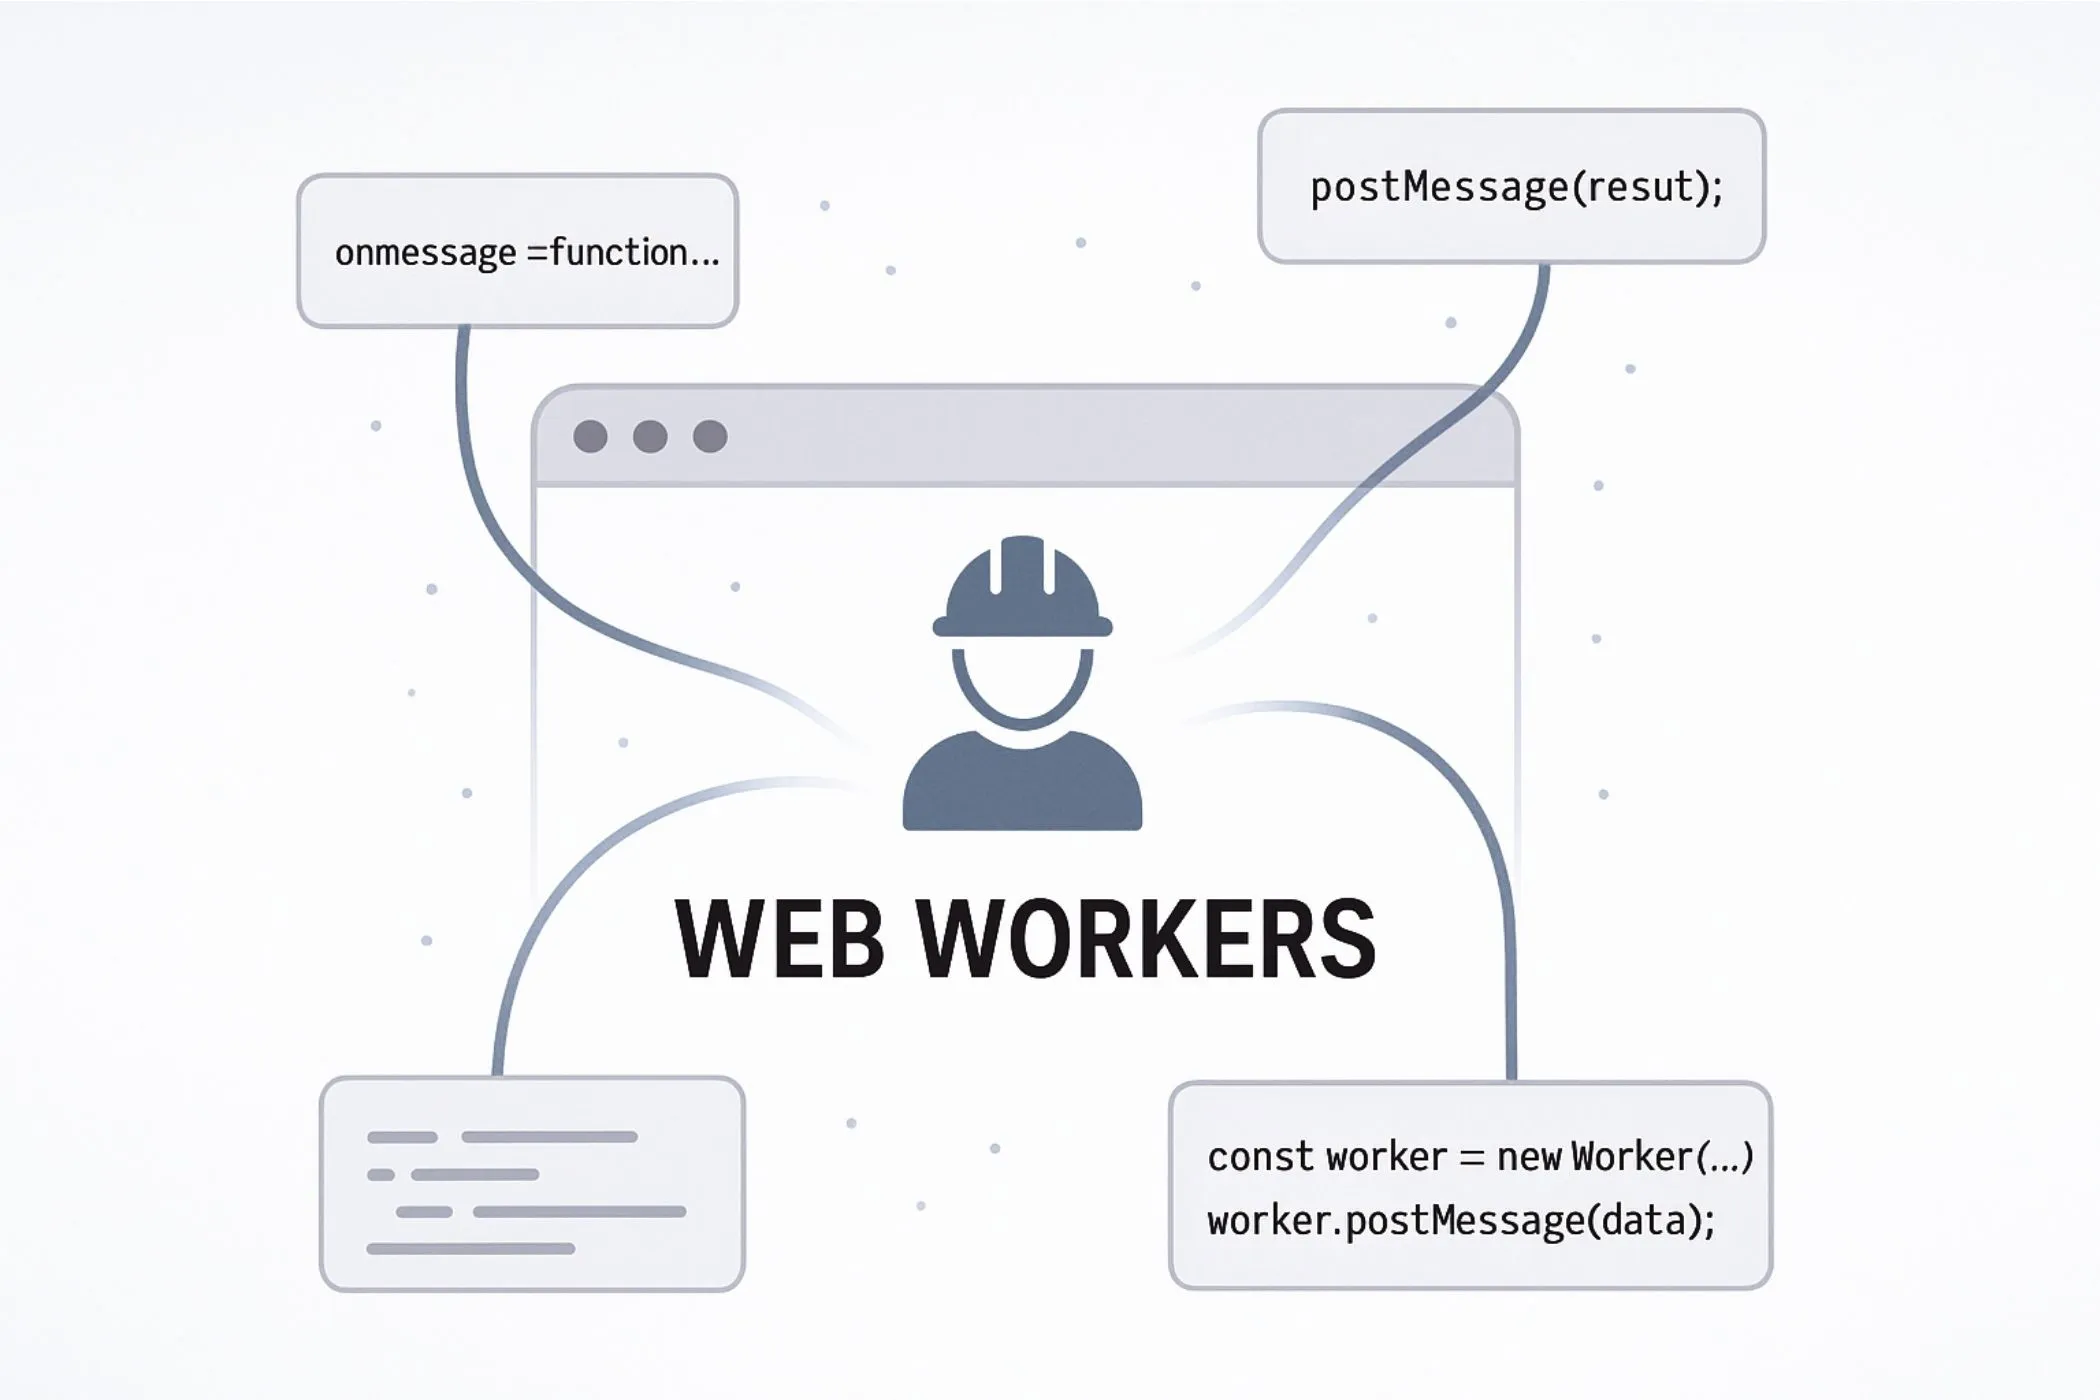
Two-Way Communication Channel
Every Web Worker sets up a two-way communication channel between:
- The main thread (your interface and logic),
- And the worker thread (your background task).
The key methods are:
worker.postMessage(data)— from main thread → to workerself.postMessage(data)— from worker → back to main thread
And the key event handlers:
worker.onmessage = (event) => {}— in the main thread, listens for responsesself.onmessage = (event) => {}— in the worker, listens for incoming jobs
Each message goes one way — but you can send as many messages back and forth as you want. Workers can emit updates, stream progress, or return final results when ready.
Here’s a recap of our doubling example:
// worker.js
self.onmessage = (event) => {
    const result = event.data * 2;
    self.postMessage(result);
};
// main.js
const worker = new Worker('worker.js');
worker.onmessage = (event) => {
console.log('From worker:', event.data);
};
worker.postMessage(10); // Sends 10, logs 20But messages don’t have to be numbers.
What Can You Send?
Web Workers can send:
- Strings, numbers, arrays
- Objects (via structured cloning)
- Typed arrays (like
Uint8Array) - Blobs, Files, and ArrayBuffers
ImageData,MessagePort, and more
Almost anything JSON-like will just work.
worker.postMessage({ type: 'resize', width: 800, height: 600 });Under the hood, the browser uses a structured clone algorithm — which safely copies the data across threads (since they don’t share memory). This ensures no side effects or race conditions.
But for big data — like files or large buffers — structured cloning can be slow. That’s where transferables come in (we’ll cover them in depth later).
Message Events
When a message is received, it comes wrapped in an event object:
worker.onmessage = (event) => {
    console.log(event.data); // the actual message
};
This means you can also use .addEventListener() if you prefer:
worker.addEventListener('message', (event) => {
    console.log('Got:', event.data);
});
Both approaches work. Choose the one that fits your style.
Sending Multiple Messages
You’re not limited to one message per worker. Workers can responde to different message types:
// worker.js
self.onmessage = (e) => {
    const { type, payload } = e.data;

    if (type === 'square') {
        self.postMessage(payload * payload);
    } else if (type === 'cube') {
        self.postMessage(payload ** 3);
    }
};
// main.js
worker.postMessage({ type: 'square', payload: 5 }); // → 25
worker.postMessage({ type: 'cube', payload: 3 }); // → 27This lets you build protocol-like interactions: pass commands, stream updates, and handle responses cleanly.
Graceful Cancellation and AbortSignals
Sometimes your app starts a long-running task in a worker — but the user navigates away, closes a modal, or changes their input before it’s done. In these cases, you don’t want to waste CPU cycles or send back stale results. You want a clean way to stop the worker.
The Problem with Unstoppable Workers
Once you call new Worker(...) the worker is instantiated and runs its code independently. Unless you’ve built your own message-based cancellation, the task will keep going — even if the user no longer cares about the result.
One brute-force option is:
worker.terminate();This halts the worker immediately. It’s like cutting the cord — fast, but destructive:
- No
finallyblock runs - No cleanup code inside the worker
- You can’t reuse the worker instance
This works in simple cases. But in more advanced scenarios (like background uploads or multi-step pipelines), you want a gentler approach.
Enter AbortSignal
Starting in modern browsers, you can use AbortSignal to coordinate cancellation between the main thread and a worker.
Here’s the basic idea:
- The main thread creates an
AbortController. - It sends the signal (
controller.signal) to the worker. - The worker listens for
signal.abortedand cleans up when triggered.
Let’s walk through it step by step.
Sending the Signal
const controller = new AbortController();
worker.postMessage({ job: 'processData', signal: controller.signal }, [controller.signal]);

// Later — cancel if needed:
controller.abort();
Note: AbortSignal is a transferable object. That’s why we pass it in the second argument as a transferable list.
Listening Inside the Worker
self.onmessage = (event) => {
    const { job, signal } = event.data;

    if (signal.aborted) return; // already aborted

    signal.addEventListener('abort', () => {
        console.log('Aborted!');
        // cleanup or early exit
    });

    doExpensiveWork(signal);
};

function doExpensiveWork(signal) {
    for (let i = 0; i < 1e6; i++) {
        if (signal.aborted) return; // check periodically
        // do something...
    }
}
The worker can use the signal both as an event listener and as a flag (signal.aborted) to check during loops.
This makes cancellation cooperative — the worker can pause, clean up, and exit gracefully, without losing control of the thread.
Auto-Cancellation Triggers You Can Use
If your UI has dynamic state — like tabs, modals, or inputs — you can connect those to worker cancellation.
Cancel When a Modal Closes
document.getElementById('modal').addEventListener('close', () => {
    controller.abort();
});
Or if the modal is removed from DOM:
const observer = new MutationObserver(() => {
    if (!document.getElementById('modal')) controller.abort();
});
observer.observe(document.body, { childList: true, subtree: true });
Cancel When Input Changes
input.addEventListener('input', () => {
    controller.abort();
    controller = new AbortController(); // create a new one for next request
});
Cancel on Page Navigation or Unload
window.addEventListener('beforeunload', () => {
    controller.abort();
});
Use these hooks to make your worker usage responsive and waste-free — especially in tools where user actions change rapidly.
Creating Module Workers with ESM
In traditional Web Workers, you use a separate .js file with no import or export statements. That works fine — but it’s stuck in the past.
With Module Workers, you can write modern ES Modules (type: 'module') — which means:
- Native
import/exportsupport - Cleaner dependency management
- Top-level
await - No need for bundler-specific hacks
This is the modern way to write workers.
Creating a Module Worker
The only difference is adding a type option:
const worker = new Worker('worker.js', { type: 'module' });That’s it. Inside worker.js, you can now write:
import { heavyFn } from './utils.js';

self.onmessage = (event) => {
    const result = heavyFn(event.data);
    self.postMessage(result);
};
Benefits of ESM in Workers
- Import utility functions or shared code directly
- Share types and modules with your main app
- Use top-level
await(great for WASM or setup code) - Fully supported in bundlers like Vite, Webpack, or Rollup
This unlocks the power of modern JavaScript — with better code reuse, testing, and collaboration across files.
Communicating with MessageChannel and MessagePort
So far, we’ve sent messages using the built-in postMessage() pipe between the main thread and a single worker. But sometimes, you need more flexibility:
- Connect two workers directly
- Create multiple communication streams to the same worker
- Route messages between parts of your app or isolate jobs
That’s where MessageChannel and MessagePort come in.
What Is MessageChannel?
A MessageChannel creates two connected MessagePort objects — port1 and port2 — that form a bidirectional, private communication channel.
const channel = new MessageChannel();Messages sent on one port are received on the other instantly and without going through the main postMessage() queue.
Sending a Port to a Worker
Transfer ownership of a port using the transfer list (second argument of postMessage)
const worker = new Worker('worker.js', { type: 'module' });
const channel = new MessageChannel();

// Transfer port1 to the worker
worker.postMessage({ port: channel.port1 }, [channel.port1]);

// Keep port2 in the main thread
channel.port2.onmessage = (e) => console.log('From worker:', e.data);
And inside worker.js:
self.onmessage = (e) => {
    const port = e.data.port;

    // Start the conversation
    port.postMessage('Worker ready!');

    // Listen for messages from main thread
    port.onmessage = (e) => {
        const input = e.data;
        port.postMessage(`Worker got: ${input}`);
    };
};
After transfer, channel.port1 is neutered in the main thread. It can no longer send or receive.
Why Use Ports?
MessagePorts let you:
- Separate UI events from background task messages
- Connect multiple workers to each other (by forwarding ports)
- Pipe messages between iframes, service workers, or shared workers
- Build advanced architectures like worker pools and message routers
They’re also transferable, which means you can dynamically assign them to other threads.
Closing Ports
Always clean up when done:
port.close(); // Stops all communicationForgetting to close ports causes memory leaks and zombie channels. Always clean up in finally, onunload, or when a task completes.
Creating Workers from Blob URLs
Normally, you create a worker from a separate .js file — that’s how the browser enforces isolation and enables caching. But sometimes you want to generate a worker entirely in memory, without any external file.
That’s where Blob URLs come in.
A Blob (Binary Large Object) lets you package arbitrary data (like a string of JavaScript) and generate a temporary URL that acts like a real file. You can use this to spawn a worker directly from code.
const workerCode = `
    self.onmessage = (e) => {
        const result = e.data * 2;
        self.postMessage(result);
    };
`;

// Create a Blob containing the code
const blob = new Blob([workerCode], { type: 'application/javascript' });

// Generate a temporary URL
const url = URL.createObjectURL(blob);

// Create the worker
const worker = new Worker(url);

// Use it
worker.postMessage(21);
worker.onmessage = (e) => console.log('Result:', e.data); // → 42

// Cleanup when done
worker.terminate();
URL.revokeObjectURL(url);
Here’s what happens under the hood:
- You define your worker’s logic as a string.
- You wrap it in a Blob with the right MIME type (
application/javascript). - You create an object URL from it using
URL.createObjectURL(). - The browser treats that URL as if it were a standalone
.jsfile — and runs it in a separate thread when you callnew Worker(url). - You revoke the URL to free memory using
URL.revokeObjectURL(url)
Why Use Blob URLs?
- No external files — everything runs inline, great for CodePen, demos, or local testing.
- Dynamic workers — you can build custom workers at runtime, even from user input or templates.
When Not to Use Them
For production tools or anything that relies on caching, module imports, or clean debugging, stick with separate files or module workers. Blob URLs are ideal for quick, ephemeral workers — not long-lived, reusable codebases.
Building a Worker Pool for Parallel Tasks
Web Workers aren’t just for one-off jobs — you can run many tasks in parallel by reusing a fixed pool of workers.
This is essential for batch processing:
- Compressing 100 images
- Parsing large datasets
- Resizing videos
Instead of creating a new worker per task (slow + expensive), you:
- Pre-create a fixed number of workers
- Keep them alive
- Assign jobs to idle workers
- Reuse them
This is a worker pool.
Tools like Vayce Image Resizer use worker pools to process file batches smoothly and fast.
What Is a Worker Pool?
A worker pool is a group of Web Workers that take turns running jobs. Instead of spinning up one new worker per task (which is slow and expensive), you:
- Create a fixed number of workers (e.g., based on CPU cores)
- Keep them alive and ready
- Assign jobs to them one by one
- Collect the results
This balances performance and resource use — letting the browser handle multiple heavy tasks without freezing the UI.
Many of our tools at Vayce — like the Image Compressor and Progressive JPEG Converter — use this exact model. They batch your work and process it in parallel using a shared worker pool.
Sizing the Pool
Modern browsers expose the number of CPU cores via navigator.hardwareConcurrency:
const maxWorkers = navigator.hardwareConcurrency || 4; // fallback to 4 if not availableYou can use this to size your pool dynamically.
Creating the Pool
Here’s a simple pattern for creating and tracking multiple workers:
const workers = Array.from({ length: maxWorkers }, () => new Worker('worker.js'));
let current = 0;

function getNextWorker() {
    const worker = workers[current];
    current = (current + 1) % workers.length;
    return worker;
}
This getNextWorker() function rotates through the pool — simple round-robin scheduling.
Submitting Jobs and Handling Responses
Each time you want to process something:
function processTask(data) {
    return new Promise((resolve, reject) => {
        const worker = getNextWorker();

        const onMessage = (e) => {
            cleanup();
            resolve(e.data);
        };

        const onError = (err) => {
            cleanup();
            reject(err);
        };

        const cleanup = () => {
            worker.removeEventListener('message', onMessage);
            worker.removeEventListener('error', onError);
        };

        worker.addEventListener('message', onMessage);
        worker.addEventListener('error', onError);
        worker.postMessage(data);
    });
}
Always remove listeners to prevent memory leaks
You wrap each job in a promise, attach a one-time message listener, and send the data. When the worker responds, the promise resolves.
Real-World Use Case: Parallel CSV Parsing
Let’s say the user uploads 100 CSV files. You want to parse them all without blocking the UI. A pool helps you do this efficiently:
const results = await Promise.all(
    files.map(file => processTask(file))
);
Each file is parsed by the next available worker — no freezing, and faster than doing it one at a time.
Advanced Control with an Idle Queue
Below is a single, self‑contained example that shows an idle‑queue worker pool in action. Paste the two files into a folder and open index.html (or run a dev server) to try it. After the code, you’ll find a section‑by‑section explanation.
// === pool.js === (main thread)
const MAX = Math.min((navigator.hardwareConcurrency || 4), 8);

const pool = Array.from({ length: MAX }, () => ({
  worker: new Worker('worker.js', { type: 'module' }),
  busy: false,
}));

// Simple FIFO task queue
const taskQueue = []; // each item: { data, resolve, reject }

// Find an idle slot, else -1
function acquireIdleIndex() {
    return pool.findIndex(s => !s.busy);
}

// Assigns tasks when a worker is free
function dispatchNext() {
    if (taskQueue.length === 0) return; // nothing to do
    const idx = acquireIdleIndex();
    if (idx === -1) return; // no worker free yet

    const slot = pool[idx];
    const task = taskQueue.shift();

    slot.busy = true;

    const onMessage = (e) => {
        cleanup();
        slot.busy = false;
        task.resolve(e.data);
        // Try to assign the next waiting task immediately
        dispatchNext();
    };

    const onError = (err) => {
        cleanup();
        slot.busy = false;
        task.reject(err);
        dispatchNext();
    };

    function cleanup() {
        slot.worker.removeEventListener('message', onMessage);
        slot.worker.removeEventListener('error', onError);
    }

    slot.worker.addEventListener('message', onMessage);
    slot.worker.addEventListener('error', onError);

    // Send the job to the worker
    slot.worker.postMessage(task.data);
}

// Enqueue a task and get a Promise for the result
export function processTask(data) {
    return new Promise((resolve, reject) => {
        taskQueue.push({ data, resolve, reject });
        dispatchNext(); // nudge the scheduler
    });
}

// Terminate the whole pool (e.g., on page unload)
export function terminatePool() {
    for (const slot of pool) slot.worker.terminate();
}

// Demo usage
async function demo() {
    const inputs = Array.from({ length: 12 }, (_, i) => i + 1);
    const results = await Promise.all(inputs.map(n => processTask({ n })));
    console.log('Results:', results);
}

demo();
// === worker.js === (module worker)
self.onmessage = async (e) => {
// Simulate work, then return a result
const { n } = e.data;
// Pretend each job takes ~100–300ms
await new Promise(r => setTimeout(r, 100 + Math.random() * 200));
self.postMessage({ n, squared: n * n });
};Pool Setup
We pre‑spawn a fixed number of workers (based on CPU cores, capped at 8). Keeping a small pool avoids the overhead of creating/destroying workers for every task and gives predictable performance.
A Simple FIFO Task Queue
Incoming jobs are pushed into taskQueue as { data, resolve, reject }. This gives us a clean separation between requesting work and running it — and makes backpressure explicit (the queue grows when all workers are busy).
Backpressure If all workers are busy, tasks wait instead of piling up
The Dispatcher
dispatchNext() is the tiny scheduler:
- If there’s no work, it exits.
- If no worker is free, it exits (and will be called again on the next completion).
- Otherwise, it pops one task, marks the worker busy, attaches one‑off listeners, and posts the message.
The listeners resolve/reject the original promise, mark the worker idle, and immediately call dispatchNext() to keep the pipeline flowing.
Public API: processTask(data)
This is the method your UI or business logic calls. It returns a Promise that resolves with the worker’s result. Internally, it just queues the job and nudges the dispatcher.
Cleanup & Lifecycle
The example includes terminatePool() for when a page/module is torn down. In a real app, call it on navigation, modal close, or when a tool becomes inactive to prevent zombie threads.
The Worker
The worker simulates work and posts back a result. In your tools, this could be parsing, encoding, or image processing. Keep worker code focused and side‑effect free.
In short: the idle queue is a tiny, fast scheduler that keeps your UI smooth while squeezing maximum work out of a few threads — the practical way Vayce tools stay responsive under load.
Working with Transferable Objects and Structured Cloning
When you send data between the main thread and a Web Worker, it gets copied — not shared. But how that copy happens matters a lot.
By default, the browser uses something called structured cloning to make a deep copy of your data. It works for almost any object — arrays, plain objects, even dates and Maps — but it can be slow for large or complex structures.
To speed things up, the platform also supports transferable objects — special data types that can be moved from one thread to another without copying. Instead of cloning the data, the browser transfers ownership. It’s zero-copy and much faster, especially for large binary buffers.
Structured Cloning (the default)
Structured cloning is the standard way to send data in postMessage() calls. It can handle most built-in types:
const buffer = new ArrayBuffer(1024);
worker.postMessage(buffer);
Behind the scenes, the browser walks through your object, creates a copy of each value, and sends it into the worker’s memory space. The worker gets a deep copy, with no reference to the original.
But cloning has limits:
- Functions and DOM nodes can’t be cloned
- Circular references may throw
- Performance drops with large nested structures
If you’re passing small objects or simple data, this is totally fine. But for heavy data (like a large ArrayBuffer or a 50MB image), structured cloning becomes the bottleneck.
Transferable Objects (zero-copy)
To avoid cloning, you can pass transferable objects — like ArrayBuffer, MessagePort, or ImageBitmap — by reference instead of copy.
const buffer = new ArrayBuffer(1024);
worker.postMessage(buffer, [buffer]);
Notice the second argument — that array tells the browser: “Transfer ownership of this object instead of cloning it.”
After the transfer:
- The main thread loses access to the buffer.
- The worker becomes its new owner.
worker.onmessage = e => {
    const result = e.data;
    // result.buffer is now owned by the main thread again
};
Which Objects Are Transferable?
As of now, these types are transferable:
ArrayBufferMessagePort(used withMessageChannel)ImageBitmapOffscreenCanvasReadableStream/WritableStream(in some browsers)AudioData/VideoFrame(for media processing)
This list is growing as more APIs are designed with workers in mind.
Gotchas and Tips
- Don’t try to reuse a transferred object — once sent, it’s gone from the sender’s context.
- Always verify browser support if using less common transferable types.
- Consider using
MessageChannelto handle multiple simultaneous streams.
Worker Limits, Memory, and Performance
Web Workers offer powerful parallelism — but they’re not infinite. Like any system resource, they come with practical limits on memory usage, CPU load, and how many you can spawn at once. Let’s walk through what to expect, how to stay performant, and where things might break.
How Many Workers Can You Spawn?
There’s no universal cap — but browsers impose internal limits based on device resources and context:
- On desktops, spawning up to 10–20 workers is usually safe.
- On mobile devices or in low-power mode, you might hit limits sooner.
- Some browsers queue workers if limits are hit; others may reject creation silently or throw errors.
If your app spawns dozens of workers, you likely need a worker pool instead.
Threading ≠ Free Performance
Each worker runs in its own thread. But more threads can mean more overhead:
- CPU contention: Too many active threads fight for cores.
- RAM usage: Each worker gets its own memory space.
- Startup time: Spawning a new worker can take tens of milliseconds.
Use workers when:
- The task takes >50ms and would block the UI.
- You need concurrency (multiple tasks at once).
- You want to stream large data without freezing the page.
Avoid them for:
- Fast, synchronous operations.
- Small, frequent updates (use
requestIdleCallback()or batching instead).
Monitoring Worker Memory
Web Workers live outside DevTools memory profiles, but you can estimate impact:
- Use
performance.memory(Chromium only) for basic insight. - Watch heap snapshots in Chrome’s Performance tab.
- Keep logs around object sizes (e.g.
ArrayBuffer.byteLength).
If your worker loads large libraries or buffers, consider:
- Transferables instead of cloning.
- Streaming data in chunks.
- SharedArrayBuffer (advanced).
Cleanup and Lifecycle
A worker stays alive until:
- You call
worker.terminate()from the main thread. - The worker calls
self.close()from within. - The tab or frame is unloaded.
Always clean up:
worker.terminate();This stops the thread and releases resources. Forgetting to do this in apps with navigation or stateful components can lead to memory leaks or zombie threads.
If you create workers dynamically (e.g. per task), make sure to manage their lifetimes — or prefer a worker pool that reuses a few.
Best Practices
- Keep workers focused: One job, one responsibility.
- Minimize shared logic — isolate only the blocking part.
- Use message batching for high-frequency updates.
- Avoid loading large third-party libs unless necessary.
- Track long-lived workers and terminate when idle.
Think of each worker as a lightweight subprocess — powerful, but with cost. Use them where they shine: offloading real work without freezing the page.
Debugging Web Workers
Debugging workers may feel strange at first — they live in their own threads, disconnected from your main code. But with the right setup, it’s easy to inspect, step through, and log what they’re doing.
Viewing Worker Scripts in DevTools
When you start a worker, it runs as a separate thread — and DevTools gives you access to it:
- Open Chrome DevTools (or equivalent in Firefox).
- Go to the Sources tab.
- In the left sidebar, expand the Workers section.
- You’ll see a separate thread listed for each running worker.
Clicking into one shows its file (worker.js) and lets you inspect code, add breakpoints, and step through just like normal JS.
Logging Inside a Worker
Yes — console.log() works inside workers.
// worker.js
console.log('Worker started');
The logs appear in your browser’s DevTools console, usually with a [worker.js] label to help differentiate.
For more structured logging:
- Prefix messages:
console.log('[Worker]', message) - Use
postMessage()to send debug info back to main thread
self.postMessage({ debug: 'Starting job…' });Catching Errors
If your worker throws an error, it won’t crash the page — but it will fire an error event you can listen for:
worker.onerror = (e) => {
    console.error('Worker error:', e.message);
};
This helps you catch issues like:
- File not found
- Syntax errors
- Runtime exceptions
You can also catch and forward errors from inside the worker:
self.addEventListener('error', (e) => {
    self.postMessage({ type: 'error', message: e.message });
});
Or wrap your logic in try/catch to send back safe messages:
try {
    // ... expensive logic
} catch (err) {
    self.postMessage({ type: 'error', message: err.message });
}
Live Reloading and Dev Tools
Many dev servers don’t reload workers by default. To enable live reload:
- Use bundlers with HMR support (
vite,webpack,parcel) - Or force a fresh URL when creating a worker:
const worker = new Worker(`worker.js?${Date.now()}`);This adds a cache-busting query param — ensuring the browser re-fetches the latest version each time.
Summary
- Use DevTools > Sources > Workers tab
- Log from workers with
console.log() - Handle errors with
worker.onerror - Catch and post errors from worker thread
- Use cache-busting or bundlers for live reload
Workers may feel isolated — but they’re first-class JavaScript environments. With proper hooks and DevTools support, you can debug them just like the main thread.
Full Demo: CSV Parser with Progress Feedback
Let’s build a complete CSV parser using a Web Worker — step by step.
You’ll see how to:
- Stream and parse a file without blocking the UI
- Show live progress feedback
- Communicate between main thread and worker
This is great for large files or data dashboards.
Step 1: Folder Structure and Setup
We’ll use three files:
csv-worker-demo/
├── index.html
├── main.js
└── csv-worker.js
Create this folder structure anywhere on your computer. You’ll open index.html in the browser directly (no server needed).
Step 2: Basic HTML UI
This gives us a file picker, a progress bar, and a log area to show results.
<!DOCTYPE html>
<html lang="en">
<head>
    <meta charset="UTF-8" />
    <meta name="viewport" content="width=device-width, initial-scale=1.0"/>
    <title>CSV Worker Demo</title>
    <style>
        body { font-family: sans-serif; padding: 2rem; background: #f4f4f4; }
        progress { width: 100%; margin-top: 1rem; }
        pre { background: #222; color: #0f0; padding: 1rem; overflow: auto; max-height: 200px; }
    </style>
</head>
<body>
    <h1>CSV Parser with Worker</h1>
    <input type="file" id="fileInput" accept=".csv"/>
    <progress id="progress" value="0" max="1"></progress>
    <pre id="log"></pre>
    <script src="main.js" type="module"></script>
</body>
</html>
Step 3: Main Thread Logic
The main thread listens for file input, starts the worker, and handles messages.
// main.js
const fileInput = document.getElementById('fileInput');
const progressBar = document.getElementById('progress');
const log = document.getElementById('log');

let worker;

fileInput.addEventListener('change', () => {
    const file = fileInput.files[0];
    if (!file) return;

    // Start a new worker
    worker = new Worker('csv-worker.js');

    // Send the file as a message
    worker.postMessage({ type: 'start', file });

    // Handle responses from the worker
    worker.onmessage = (e) => {
        const { type, data } = e.data;

        if (type === 'progress') {
            progressBar.value = data;
        } else if (type === 'log') {
            log.textContent += data + '\n';
        } else if (type === 'done') {
            log.textContent += 'Done parsing!';
            worker.terminate();
        }
    };

    worker.onerror = (err) => {
        log.textContent += `Worker error: ${err.message}\n`;
    };
});
Explanation:
- We wait for a file to be selected.
- A new worker is spun up and handed the file.
- The worker sends progress updates and final results.
Step 4: Worker Thread Logic
This is where the CSV is streamed, parsed, and reported back.
// csv-worker.js
self.onmessage = async (e) => {
    const { type, file } = e.data;
    if (type !== 'start') return;

    if (!(file instanceof File)) {
        self.postMessage({ type: 'log', data: 'Invalid file input' });
        return;
    }

    const reader = file.stream().getReader();
    const decoder = new TextDecoder('utf-8');

    let totalSize = file.size;
    let loaded = 0;
    let leftover = '';
    let lineCount = 0;

    while (true) {
        const { value, done } = await reader.read();
        if (done) break;

        const chunk = decoder.decode(value, { stream: true });
        loaded += value.length;

        const lines = (leftover + chunk).split('\n');
        leftover = lines.pop();

        for (const line of lines) {
            lineCount++;
            if (lineCount <= 5) {
                self.postMessage({ type: 'log', data: `Row ${lineCount}: ${line.slice(0, 80)}...` });
            }
        }

        self.postMessage({ type: 'progress', data: loaded / totalSize });
    }

    self.postMessage({ type: 'log', data: `Parsed ${lineCount} rows` });
    self.postMessage({ type: 'done' });
};
Explanation:
- We read the file stream chunk by chunk.
- We use
TextDecoderto convert binary to text. - We split into lines and simulate parsing.
- We send progress updates and sample rows.
This approach avoids memory overload and keeps things responsive.
Step 5: Putting It All Together
To try this on your computer:
- Create a folder (e.g.
csv-worker-demo) - Save the files:
index.html(from Step 2)main.js(from Step 3)csv-worker.js(from Step 4)
- Open
index.htmlin your browser. - Upload any
.csvfile to see it parsed with progress.
You now have a working CSV parser that runs fully in-browser — powered by Web Workers.
Final Thoughts
Web Workers are more than just background threads — they’re how the browser multitasks. They let your interface stay responsive while heavy code runs in parallel, turning JavaScript into a small-scale runtime for data processing, image editing, and file handling.
Workers form the backbone of many Vayce tools. They keep computation local, private, and fast — no uploads, no lag, no blocked UI.
When you understand how threads talk, share data, and clean up, you can design interfaces that feel instant even under heavy load. That’s the premise of workers: true multitasking, right inside the browser.
For deeper references and examples, see the Web Workers documentation on MDN.